SAILING Sailing These parameters determine how your ship sails.
Max Speed Maximum Speed How fast your ship can move in battles. Improving battle speed does not improve Open Sea speed. :
15.25
Acceleration Acceleration Determines how fast the ship gains speed. :
0.75
Deceleration Deceleration Determines how fast the ship loses speed. Lower values are better if you want to maintain speed, higher values are better if you want to stop quickly. :
1.30
Turning (Fast) Fast Turn Rate The Ship's turn rate in degrees per second. This is how fast the ship turns if it is moving at maximum speed. :
7.65
Turning (Slow) Slow Turn Rate The Ship's turn rate in degrees per second. This is how fast the ship turns if it is moving at a speed of at least 4 knots. :
2.75
Turning Accel Max Turning Acceleration This shows how fast a ship accelerates into a turn. The higher the value, the faster the ship reaches its maximum turn rate. :
4.50
Turning Decel Min Turning Deceleration Ships gradually suffer less deceleration as they turn. This shows a minimum amount of deceleration a ship has when turning. Lower numbers (relative to other acceleration stats) are better. :
8.35
Best Point Best Point The wind angle at which the ship can attain its maximum speed. The wind comes from angle 0o, and angle 180o is running with the wind at your back. :
135
SHIP
Capacity Capacity How many units of cargo the ship can hold. :
200
O.S. Visibility Open Sea Visibility How far away other ships will spot you on the open sea. :
75.0 mi
O.S. Spotting Open Sea Spotting Increases your spotting range, allowing you to detect ships beyond their O.S. Visibility. :
0.0
Crew Crew The maximum number of crew on your ship. Shows the fighting strength of your crew. :
675
Target Tracking Target Tracking Reduces the accuracy penalties you suffer due to your movement and your target's movement. Improves your chance to hit fast moving ships. :
13
LEVEL (SIZE) Level and Size The level required to use this ship, and the size of the hull. :
40 (Colossal)
DURABILITY Durability The number of ships you have left. Decreases by 1 whenever the ship is defeated in combat (with the exception of skirmish). :
4
INSURANCE VALUE Insurance Value Amount of doubloons you will receive for this ship if she is sunk or scuttled. :
7072
HEALTH Health The ship's Health stats show how much damage it can sustain.
Integ. Integrity The ship's Integrity stats show how much damage it can sustain.
DR Damage Reduction Shows how much the ship's armor reduces the damage it receives.
Hull Hull (Structure) The internal structure of your ship. When your structure runs out, your ship sinks. :
2250
-
Port Port (Left) The ship's port armor. Armor facings protect the ship's hull. :
1440
11
Stbd Starboard (Right) The ship's starboard armor. Armor facings protect the ship's hull. :
1440
11
Bow Bow (Front) The ship's bow armor. Armor facings protect the ship's hull. :
720
2
Stern Stern (Rear) The ship's stern armor. Armor facings protect the ship's hull. :
360
2
Sails Sails & Masts Shows how much damage the ship's sails and masts can sustain. Ships lose speed as they take sail damage. :
2670
MODIFIERS Modifiers These change your chance to hit, chance to get hit and the damage you take.
OFF Offense Offensive modifiers are a percentage increase to your chance to hit. The numbers here include any benefits from 'Accuracy, All' items.
DEF Defense Defensive modifiers are a percentage decrease to the chance enemies will hit you. The numbers here include any benefits from 'Defense, All' items.
RES Resistance Resistance is a percentage reduction in the damage you take.
Sails Sails Offense, defense and resistance values for your ship's sails and masts. :
0
18
0.0
Crew Crew Offense, defense and resistance values for your ship's crew. :
0
18
0.0
Bow Bow (Front) Offense, defense and resistance values for your ship's bow armor. :
0
18
0.0
Stern Stern (Rear) Offense, defense and resistance values for your ship's stern armor. :
0
18
0.0
Sides Broadsides (Left & Right) Offense, defense and resistance values for your ship's broadsides. :
0.0
18
0.0
Grapple Grappling Grappling offense makes it easier to board ships. Grappling defense protects you against hostile boarding attempts. :
0.0
0.0
-
BATTERIES Batteries The guns on your ship are divided into batteries. Guns within a single battery are identical and are controlled as a group.
Type Quantity & Weight This shows number and size of the guns in the battery. Heavier guns do more damage, have longer range and penetrate armor better. Lighter guns reload faster and are better at dealing sustained damage against unarmored targets.
Reload Reload The time it takes to reload the entire battery of guns, in seconds.
Damage Maximum Damage This shows how much damage each cannon can do at minimum range using heavy round shot. Damage gradually decreases as your target gets farther away.
Range Maximum Range This shows how far the cannons can fire heavy round shot. Other ammo types modify this range.
Acc Accuracy This shows the cannon's percentage chance to hit a standard target at 200 or 400 yards away. The chance to hit is increased based on target size, and decreases based on movement.
200/400 Accuracy This shows the cannon's percentage chance to hit a standard target at 200 or 400 yards away. The chance to hit is increased based on target size, and decreases based on movement.
Swivels Swivel guns fire anti-personnel shot, spraying enemy decks with a lethal cloud of musket-balls. :
6x1/2lb
8.0s
7.0
100
-- / --
Topdeck:
10x4lb
15.0s
24.0
350
99 / --
Upperdeck:
20x9lb
27.0s
29.0
525
107 / 84
Fore gun Guns in the front of the ship, also known as bowchasers. :
2x12lb
35.0s
32.0
575
110 / 89
Aft gun Guns in the back of the ship, also known as sternchasers. :
2x18lb
45.0s
38.0
625
112 / 92
Polars
Upwind & Luffing
Close Haul
Close Haul
Beam Reach
Beam Reach
Broad Reach
Broad Reach
Running
25% - 35%
3.81 - 5.34 knots
50°
9.91 knots
65%
9.91 knots
65%
12.58 knots82.5%
82.5%12.58 knots
15.25 knots
100%
15.25 knots
100%
12.2 knots
80%
Open Sea Speed: 52
Information based on version 1.20.51.0
Current game version is 2.15.46.0
History
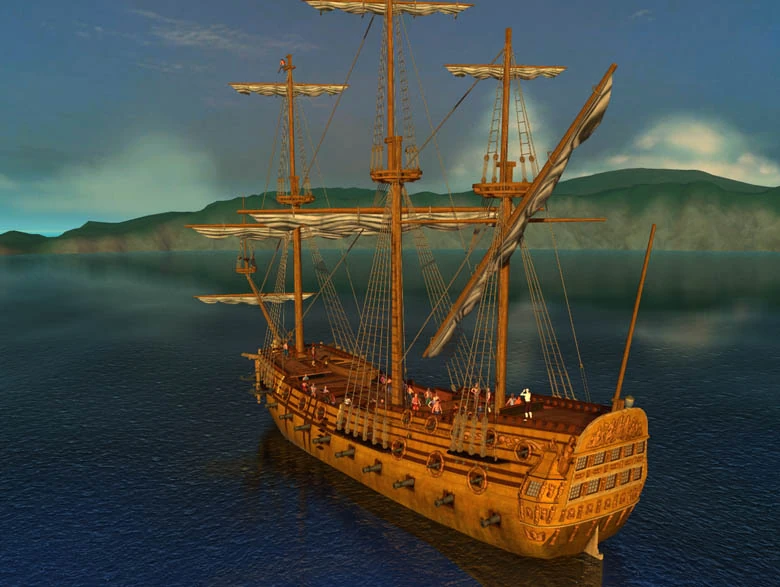
The HBMS Mordaunt was built to perform as a powerful merchant ship. HBMS Mordaunt was commissioned for Lord Mordaunt who required an effective merchant ship capable to defend itself against attack. Lord Mordaunt had much hard luck as his investors pulled out before the ship was completed. Following its launch the Spanish Ambassador accused Lord Mordaunt of using the vessel to help the Brandenburg government in its fight against Spain. Under the current political climate, the British court impounded the ship until Lord Mordaunt paid a huge sum to guarantee its peaceful use. In the end the ship was taken into the Royal Navy because Lord Mordaunt couldn’t pay the crew’s salary.
HBMS Mordaunt (46 guns), in 4 September 1688, John Tyrrell (Oakley) was appointed to command the ship. The ship took part in the action on 4 October 1689, when a group of English cruisers fell in with 12 French warships.
The HBMS. Mordaunt under Captain Francis Maynard sank at the Los Colorado Reefs, Cuban waters, with all crew lost on November 21, 1693. It however remains one of the most beautiful ships ever designed for the merchant navy.
Strategy and Use
The Mordaunt Crew Transport was an experimental ship. The main purpose of the ship was to board the enemy to capture the enemy ship.
Since the recipe for this ship was removed from game, no one knows if any deeds or physical ships still remain. Although, the ship deed is still spawnable via the spawn table available to GMs and FLS Staff.
Tactics
A popular tactic was to outfit the Mordaunt Crew Transport for grappling and then hunt enemy ships on the open sea while working with fast ships capable of disabling a target. Once disabled, the Mordaunt Crew Transport would board the other ship.